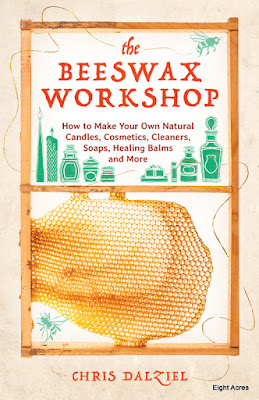
Since we got our own bee hives I've been able to enjoy the many benefits of bees. Honey, improved pollination and lots of beeswax (and the occasional bee sting). I was excited to receive a review copy of The Beeswax Workshop: How to Make Your Own Natural Candles, Cosmetics, Cleaners, Soaps, Healing Balms and More , by of Chris Dalziel (Affiliate link).

This book came at a good time, we have harvested honey several times and have rather a lot of beeswax to use up (see my post about how to refine beeswax). As you know, I already use beeswax in salves, lip balm and honey and oatmeal soap. The Beeswax Workshop takes that even further, instructions for making everything from candles, to foodwraps, lotions and wooden cutting board polish... I've made a list of all the projects that I want to try, but it was the cutting board polish that stood out.
We have a collection of wood cutting boards, having retired a set of nasty plastic boards. Wooden chopping boards are lovely to use, and if you get a gum or pine, they are naturally antimicrobial. The only problem is that they start to dry out and need to be oiled regularly. I had been occasionally smearing sunflower oil over them when I remembered, but that is a messy and annoying process. As food is exposed to your chopping board, its nice to know that you're cleaning it with something that is food-safe, and this recipe only have three simple ingredients.
As with the neem oil salve, adding beeswax to the oil just makes it more manageable. I can't believe I didn't think of it myself! When I read the recipe in The Beeswax Workshop I knew this was the solution to keeping our wooden chopping boards in good condition.
Of course I didn't follow the recipe exactly.... I changed the oil and the essential oil, but the beeswax is the key ingredient!
Wooden Chopping Board Polish
100mL sunflower oil (or any other light oil)
10g beeswax
20 drops essential oil (I used eucalyptus essential oil)
2 drops Vitamin E
Measure out the ingredients, heat in a double boil until the beeswax is melted and pour into a jar or tin. As soon as the polish is set you can go ahead and rub it into your wooden chopping boards with a clean rag. This should be done whenever they look dry, and now its much easier.
To clean wooden chopping boards, its best to wipe the board with a warm cloth, not too much soap or detergent as that will remove the oil again. Don't put them in a dishwasher! Leave them in a breezy place to air-dry.
If you don't have your own beehives, you can buy beeswax from local beekeepers or from my Etsy store.
Do you use wooden chopping boards? How do you look after them? And how do you use beeswax?


We have a collection of wood cutting boards, having retired a set of nasty plastic boards. Wooden chopping boards are lovely to use, and if you get a gum or pine, they are naturally antimicrobial. The only problem is that they start to dry out and need to be oiled regularly. I had been occasionally smearing sunflower oil over them when I remembered, but that is a messy and annoying process. As food is exposed to your chopping board, its nice to know that you're cleaning it with something that is food-safe, and this recipe only have three simple ingredients.
 |
| "uncapping" beeswax to be refined |
As with the neem oil salve, adding beeswax to the oil just makes it more manageable. I can't believe I didn't think of it myself! When I read the recipe in The Beeswax Workshop I knew this was the solution to keeping our wooden chopping boards in good condition.
Of course I didn't follow the recipe exactly.... I changed the oil and the essential oil, but the beeswax is the key ingredient!
 |
| our wooden chopping board collection |
Wooden Chopping Board Polish
100mL sunflower oil (or any other light oil)
10g beeswax
20 drops essential oil (I used eucalyptus essential oil)
2 drops Vitamin E
Measure out the ingredients, heat in a double boil until the beeswax is melted and pour into a jar or tin. As soon as the polish is set you can go ahead and rub it into your wooden chopping boards with a clean rag. This should be done whenever they look dry, and now its much easier.
To clean wooden chopping boards, its best to wipe the board with a warm cloth, not too much soap or detergent as that will remove the oil again. Don't put them in a dishwasher! Leave them in a breezy place to air-dry.
If you don't have your own beehives, you can buy beeswax from local beekeepers or from my Etsy store.
Do you use wooden chopping boards? How do you look after them? And how do you use beeswax?

Comments
Post a Comment
Thanks, I appreciate all your comments, suggestions and questions, but I don't always get time to reply right away. If you need me to reply personally to a question, please leave your email address in the comment or in your profile, or email me directly on eight.acres.liz at gmail.com